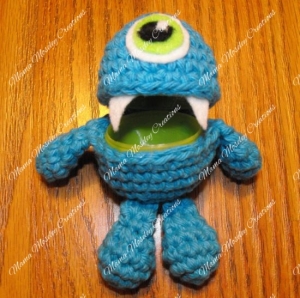
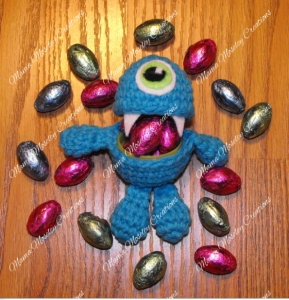
Easter of 2015 I wanted to make something cute and different to include in my children’s Easter baskets. I found a great idea from One Dog Woof called Little Monster Easter Egg Crochet Pattern. I love her pattern. However, I found it to be a bit larger than the plastic eggs we have locally. Below is my modified version of her pattern. I have made a ton of these and people use them for a fun little addition to their desk, tooth holders for the tooth fairy, toppers for a baby shower gift and more!
Stay tuned! I have used the Monster Egg pattern to make some Halloween Buddies and will be sharing them with you soon! It’s going to be an Eggciting Eggstraviganza!
We will not be stuffing the body of the egg. The body is created in two parts and stitched together. The rounds are worked continuously, with no joining seams.
Supplies Needed:
Lily Sugar ‘n Cream Cotton Yarn in Hot Blue (or other cotton worsted weight yarn)
size E (3.50 mm) crochet hook
Plastic Egg (about 2.5” x 1.5”
white, green, black felt pieces
scissors
yarn needle
hot glue
small amount of polyfil stuffing
Abbreviations:
sts – stitch
sc – single crochet
sc2tog – single crochet to stitches together, to decrease a stitch in the round.
EGG TOP:
Round 1: Start with a magic circle. Work 6 sc into magic circle. (6 sts)
Round 2: Work 2 sc in each stitch around. (12 sts)
Round 3: *Sc 2, then sc 2 in next stitch.* Repeat from * around. (16 sts)
Round 4: *Sc 3, then sc 2 in next stitch.* Repeat from * around. (20 sts)
Round 5: *Sc 4, then sc 2 in next stitch.* Repeat from * around. (24 sts)
Round 6-8: Work 1 sc in each stitch around. (24 sts)
Fasten off but leave a long tail.
The tail will be used to stitch the bottom and top of the egg together
EGG BOTTOM:
Round 1: Start with a magic circle. Work 6 sc into magic circle. (6 sts)
Round 2: Work 2 sc in each stitch around. (12 sts)
Round 3: *Sc 1, then sc 2 in next stitch.* Repeat from * around. (18 sts)
Round 4: *Sc 2, then sc 2 in next stitch.* Repeat from * around. (24 sts)
Round 5-7: Work 1 sc in each stitch around. (24 sts)
Fasten off and weave in ends. Attach the egg top and bottom across 6 stitches to create a good connection.
ARMS:
Round 1: Start with a magic circle. Work 6 sc into magic circle. (6 sts)
Round 2: *Sc 1, then sc 2 in next stitch.* Repeat from * around. (9 sts)
Round 3: Work 1 sc in each stitch around. (9 sts)
Round 4: *Sc 1, sc2tog next stitch.* Repeat from * around. (6 sts)
Round 5: Work 1 sc in each stitch around. (6 sts)
Tuck a small piece of polyfil into each arm.
Flatten the piece and sc together. Fasten off but leave a long tail. Sew to the bottom of the egg body.
LEGS:
Round 1: Start with a magic circle. Work 6 sc into magic circle. (6 sts)
Round 2: Work 2 sc in each stitch around. (12 sts)
Round 3-4: Work 1 sc in each stitch around. (12 sts)
Round 5: *Sc 2, sc2tog next stitch.* Repeat from * around. (9 sts)
Start stuffing the legs firmly.
Round 6: *Sc 1, sc2tog next stitch.* Repeat from * around. (6 sts)
Round 7: Work 1 sc in each stitch around. (6 sts)
Flatten the piece and sc together. Fasten off but leave a long tail. Sew to the bottom of the egg body.
FACE:
1. Cut out circles in white, blue and black felt. Cut a tiny piece of white felt for the shine in his eye. Hot glue the layers together to make the eye. Glue the eye to the body.
2. Cut out triangles from the white felt and glue to the inside of the body for the teeth.
FINISHING:
Put a little hot glue on the bottom half of the plastic egg and press firmly into the bottom of the body. Also secure the edge of the bottom piece with glue. Do the same with the top half of the plastic egg. The egg should be able to open and close with a little squeeze.
Enjoy this pattern!
This pattern is for personal use only. Please do not claim this pattern as your own, or sell or distribute it. If you would like to share this pattern, please link to this site and do no repost the pattern on your site. You can sell finished items made from this pattern, but please link back and give credit to Mama Moseley Creations. Thanks!